
Manage Certifications
Welcome to our guide on managing your coaches' certifications and documents. This article walks you through how to view, add, or edit coach requirements.
View Current Certification Requirements
To get started, follow these steps:
Click on Manage > Staff.
Locate any staff member and click their Certification button (the countdown clock) to open a popover.
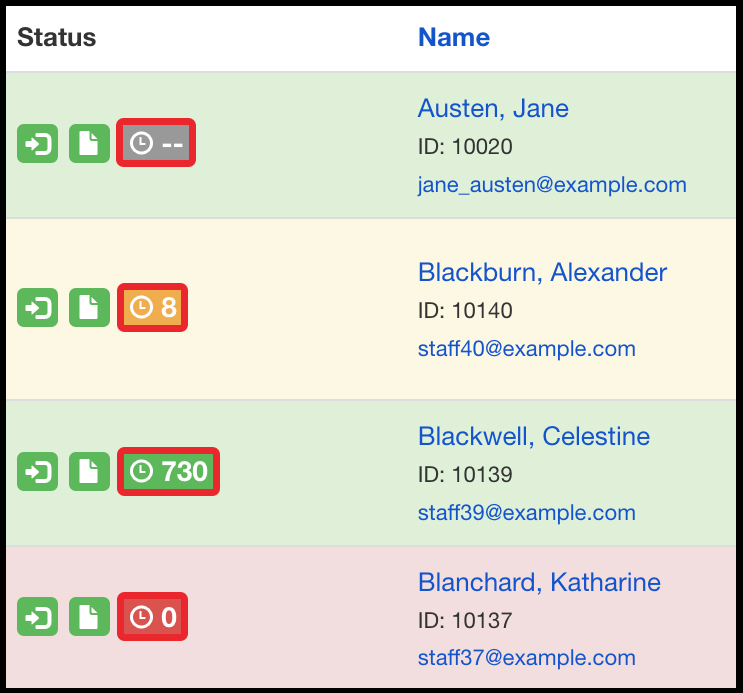
Certification Expiration Status
Use the key below to identify the current status of a certification.
Gray - No Certifications applied to the account
Yellow - Expiring soon
Red - Expiring within the next month
Red with "0" - Expired OR Certification information has not been entered
Green - Current
Green with Infinity Symbol - Certification never expires
Adding a New Certification
An administrator can manually add a custom or templated certification to individual staff/coach accounts. Here's how:
Click on Manage > Staff.
Locate the staff member for whom you need to upload documents.
Click the Document button in their row.
Input all relevant information:
Certification Title - The name of the certification
Certified On (Optional) - The date when the certification was completed
Expiration Date (Optional) - The date when the certification will expire
Notes (Optional) - Include any important notes for this staff member/certification.
Click Create Certification.
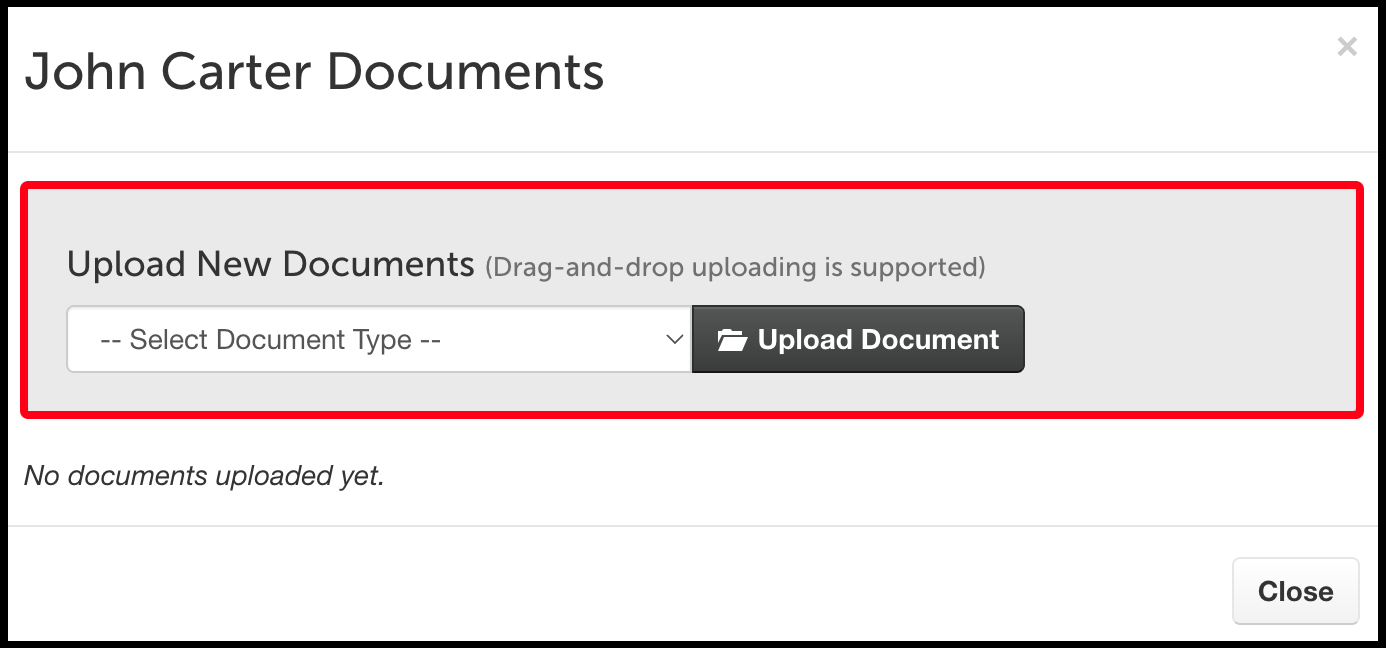
Upload Certification Documents
Staff may be required to upload certificates of completion to confirm completion of their courses. FinalForms provides a document folder to store these items.
Click Manage > Staff.
Locate the staff member for whom you need to upload documents.
Click the Document folder in their row:
Click the button to choose a file to upload.
Locate the file on your computer, and click Open.
Alternatively, you can drag and drop the file if you already have it.
Important Note - Uploading a document does not create a countdown that reminds your coach to renew a certification. You must follow the steps in the Adding a New Certification section above to create the reminder functionality. Uploading a file simply helps you centralize documentation.
Review Certification Documents
An administrator will need to manually review all certifications uploaded by staff members to ensure they are complete and update their compliance status. Follow the steps below to begin the review process:
Click Manage > Staff.
Locate any staff or click the By Status filter and select Unreviewed under Documents to find all staff with unreviewed documents.
Click the Document folder in their row.
Find the document you need to review and click the Edit button.
Click the file link to download the document for review. You can update the review status to Accepted or Denied.
Click the Save button to save your changes.
Follow the steps in the Adding a New Certification section above to create the reminder functionality.
By following these guides, you can ensure that the certifications your district requires are accurate and up to date for all staff. If you have any questions or need further assistance, feel free to reach out to our Support Team!